Mastering the art of mixing drums with minimal effort can seem daunting, but with the right techniques, anyone can achieve a professional sound. Here are three highly effective methods to get natural but punchy compression, low-end energy with focus, and controlled space and realism for your drums. Whether you're using one mic, working on the drum bus, or dealing with MIDI drums, these techniques will help you whip those drums into shape.
Technique 1:
Adding Low-End Energy and Focus with a Pultec EQ
The first technique involves using a Pultec-style EQ to add low-end energy and focus, while also enhancing the sizzle of your hats and cymbals. This method leverages a unique characteristic of the original Pultec hardware, where boosting and attenuating at the same frequency creates a focused and punchy low end.
Steps:
- Boost and Attenuate: Start by boosting at 100 Hz to add low-end punch. Then, bring in the attenuation at the same frequency. This not only boosts the low end but also tightens it, giving a focused sound.
- Enhance Highs: Next, boost around 8 kHz to add some sizzle to the hats and cymbals.
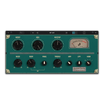
- Plugins: For this demonstration, Black Rooster's Pultec EQ was used. Alternatively, you can try Rare by Analog Obsession, a free Pultec emulation.
Before and After:
-Without EQ: The drums sound flat and lifeless.
-With EQ: The drums have a noticeable low-end boost and focus, with added clarity in the high end.
Technique 2:
Achieving Punchy Compression with Parallel Processing
The second technique uses parallel compression to add punch and energy to your drums. This involves creating a separate bus for compression, allowing you to blend the heavily compressed signal with the dry signal.
Steps:
- Create a Parallel Compression Bus: Send your drum track to a new bus, which we'll call "Drum Crush."
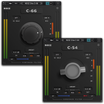
- Add Compression: Insert a compressor on this bus. For this example, Core Compressor was used, which has a convenient "Crush" button that dials in aggressive settings suitable for parallel compression.
Blend the Signals: Adjust the blend between the dry drum signal and the heavily compressed signal to taste.
Before and After:
-Without Parallel Compression: The drums lack punch and energy.
-With Parallel Compression: The drums gain significant punch and presence, sounding fuller and more energetic.
Technique 3:
Creating Controlled Space and Realism with Reverb
The final technique involves adding reverb to create a sense of space and realism. Instead of applying reverb directly to the drum track, use an aux or effects bus. This allows you to further shape the reverb with additional processing like EQ, compression, or saturation.
Steps:
- Create a Reverb Bus: Send your drum track to a new aux or effects bus.
- Add Reverb: Insert a reverb plugin. A plate reverb works well for drums, but remember, less is more when it comes to drum reverb.
- Shape the Reverb: Use a high-pass filter to cut low-end rumble and a low-pass filter to prevent harshness in the high end. You can also add compression or saturation to the reverb if needed.
Before and After:
- Without Reverb: The drums sound dry and flat.
- With Reverb: The drums have a controlled sense of space and realism, enhancing the overall mix without overpowering it.
Conclusion
These three simple yet powerful techniques can transform your drum mix. By adding low-end focus with a Pultec EQ, achieving punchy compression with parallel processing, and creating controlled space with reverb, you can elevate your drum sound to professional levels. Give these methods a try in your next mix session and experience the difference.

