Understanding compressors is crucial for any audio engineer. At N.A. Studios, Sam Loose breaks down the essentials of compressors, focusing on their controls and how they affect your audio. This guide will help you grasp the fundamentals and apply them effectively, regardless of the DAW you use.
What is Compression?
Compression is all about controlling the dynamic range of audio. It reduces the volume of loud sounds and amplifies quieter ones, creating a more balanced and polished track. This process is governed by five key controls: Threshold, Ratio, Attack, Release, and Makeup Gain.
Key Controls of a Compressor
Threshold
- The threshold sets the level at which compression begins. If your audio exceeds this level, compression is applied.
- Example: Setting a threshold at -12.5 dB means any audio above this level will be compressed.
Ratio
- The ratio determines how much compression is applied once the audio surpasses the threshold.
- Example: A ratio of 4:1 means for every 4 dB over the threshold, only 1 dB will be allowed to pass.
Attack
- Attack controls how quickly the compressor responds to audio that exceeds the threshold.
- Example: A fast attack time clamps down quickly on transients, which can squash the initial hit of a drum. A slower attack time lets more of the transient through, adding punch.
Release
- Release determines how quickly the compressor stops compressing after the audio falls below the threshold.
- Example: A short release time can make the compression sound more aggressive, while a longer release time can create a smoother, more natural sound.
Makeup Gain
- After compression, the overall volume might be reduced. Makeup gain boosts the compressed signal to match the original level.
- Example: If your compressed signal is quieter, you can add makeup gain to restore its loudness.
Practical Application: Compressing Drums
Let's apply these principles to a drum track. We'll use a drum loop with added kicks and snares to highlight the compression effects.
Setting the Ratio and Threshold
- Start with a ratio of 4:1 and gradually lower the threshold to see gain reduction.
- Listen to how the compressor affects the peaks of the kick and snare.
Adjusting the Attack
- Set the attack to zero and slowly increase it. You'll notice the initial hit of the drum becoming more pronounced as the attack time increases.
- A longer attack time allows more of the transient through, adding punch to the drums.
Tweaking the Release
- Adjust the release time to control how quickly the compression eases off.
- A shorter release time can make the tail of the snare more pronounced, while a longer release time smooths it out.
Balancing with Makeup Gain
- After setting the threshold, ratio, attack, and release, use the makeup gain to restore any lost volume.
- Compare the compressed signal with the original to ensure a balanced sound.
Visualizing Compression
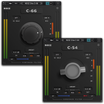
Using a graphical display, like the one in Logic Pro, helps visualize the gain reduction and how the compressor affects your audio. Switch from a VU meter to a graph to see the changes in real-time.
Tips for Effective Compression
- Understand Your Source Material: Different sources require different settings. Drums, vocals, and other instruments all respond uniquely to compression.
- Experiment with Settings: Don’t be afraid to tweak the controls and listen critically. Each track may need a different approach.
- Use Compression Sparingly: Over-compression can kill the dynamics of your track. Aim for a natural, balanced sound.
By mastering these controls and understanding their impact, you can enhance your mixes, making them more professional and polished. Hopefully this will help you get the most out of your compressors!

